|
Computer Aided Pattern Design
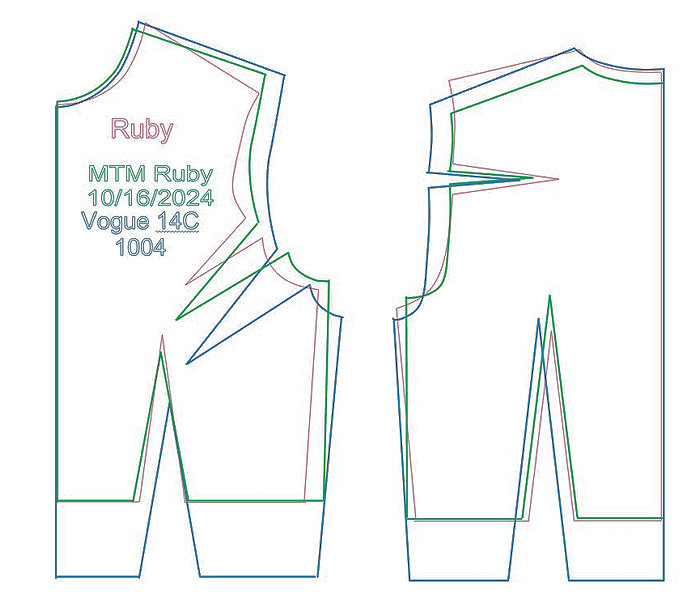
by Don McCunn RTW to MTM to BespokeDesigns can be classified as having three degrees of fit: RTW, MTM, and Bespoke. A RTW fit can be changed to MTM using 5 measurements of an individual. The procedure for doing this is described in Altering RTW to MTM. This changes the dimensions of the patterns but not the shape based on the contours of the body.  In the image above the red is the Bespoke fit, the green is the MTM, and the blue is the RTW. Notice the MTM is different from the Bespoke in several ways.
This MTM fit can be changed to a Bespoke fit when the designer can do an in-person fitting of the client to adjust the patterns to the shape of the body. I use this definition of Bespoke out of deference to the law in France that says a firm can only use the term "haute couture" if it designs made-to-order garments for private clients with one or more fittings. Wikipedia In How to Make Sewing Patterns the instructions for a Bespoke fit take up half the book to create a Master Pattern (aka Sloper) that can then be used to create a design. Clearly going from a MTM to a Bespoke fit is much faster and easier. Here are my recommendations for achieving a Bespoke fit.
There are at least three ways any necessary changes to the locations of seams can be marked: use a Marks-Be-Gone pen, indicate locations with pins, use long hand basting stitches in contrasting thread. Hopefully minimal adjustments will need to be made. If the fit of Steps 7 and 8 needs adjusting, it may be necessary to unbaste the seams and repin them in place. Sometimes it may be helpful to have the client wear the mock-up both right side out and wrong side out during the process. Given that the MTM pattern should be close to the size and shape of the body, only minimal adjustments should be required. Copyright © 2024 by Donald H. McCunn
|